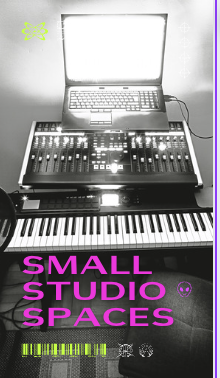
Building a Home Recording Studio : A Step-by-Step Guide
Are you tired of struggling to capture what you hear in your head in your makeshift home studio? Do you want to create a professional-grade recording space in the comfort of your own home? If so, you're in the right place.
Building a home recording studio like a pro requires careful planning, investment, and attention to detail. With our step-by-step guide, you'll learn everything you need to create a space where you can record comfortably and professionally. Just remember these things do not happen overnight! Pace yourself and plan it out.
Key Takeaways:
Building a home recording studio requires careful planning and investment.
Assess your needs and set a realistic budget before you begin.
The location and acoustics of your space are crucial for optimal sound quality.
Invest in essential recording equipment and software to capture high-quality audio.
Proper soundproofing techniques and acoustic treatment are essential for superior sound.
Assessing Your Needs and Budget
Before starting the exciting journey of building your home recording studio, it's crucial to assess your needs and budget to ensure a successful outcome. Determining your needs will help you identify the equipment necessary for your studio and optimize your space to achieve the best recordings possible.
Identifying Your Needs
The first step in identifying your needs is determining the purpose of your studio. Is it for recording vocals, instruments, or both? Will you be recording music, podcasts, or voice-overs? These are essential questions to consider before choosing your equipment and setting up your space.
Once you have established your purpose, it's time to make a list of the equipment you will need. Here are some of the essential items you'll want to consider:


It's important to research and invest in quality equipment that will last and provide the best results. However, it's equally important to allocate your funds wisely and stay within your budget.
Setting Your Budget
Setting a realistic budget is crucial in building a successful home recording studio. It's easy to get carried away and overspend, but it's essential to prioritize your needs and allocate your funds accordingly. Here are some helpful tips for setting your budget:
Research the equipment you need and compare prices from different vendors to find the best deals.
Consider purchasing used or refurbished equipment to save money.
Allocate your funds to prioritize essential items first, such as microphones and audio interfaces.
Plan for future upgrades and expansion to avoid overspending in the long run.
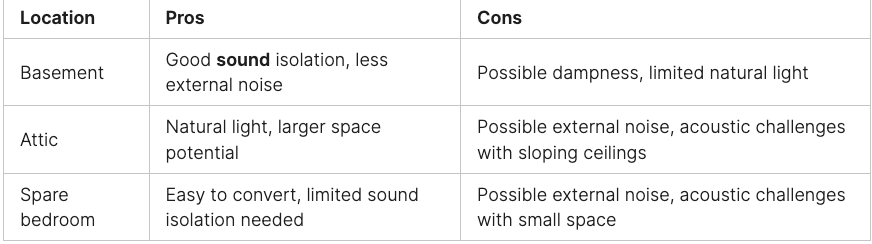
Choosing the Perfect Location
When it comes to building a home recording studio, the location you choose can make a significant impact on the quality of your recordings.
Factors to consider when selecting the ideal space:
The size of the room
The shape of the room
The height of the ceiling
The location of the room (inside or outside of the house)
The accessibility of the room
Once you've addressed these factors, it's time to find a suitable location for your home recording studio. Ideally, you want a space that is far away from any external noise sources, such as traffic or construction. You'll also want to consider the acoustics of the room.
Some locations to consider:
Soundproofing Your Studio
When it comes to building a home recording studio, soundproofing is crucial to achieve high-quality recordings. Soundproofing helps to minimize external noise interference and create an isolated environment for recording. In this section, we'll explore various methods and materials to soundproof your studio.
1. Understanding Soundproofing
Sound transmission occurs through vibrations. These vibrations travel through the air and any object it comes into contact with, including walls, ceilings, and floors. Thus, soundproofing involves creating barriers that prevent sound waves from transmitting through objects and air. To soundproof your studio, you need to target three main areas:
Walls
Ceiling
Floor
By applying soundproofing materials to these areas, you can greatly minimize external noise interference.
2. Soundproofing Materials
There are various materials that you can use to soundproof your studio. They include:
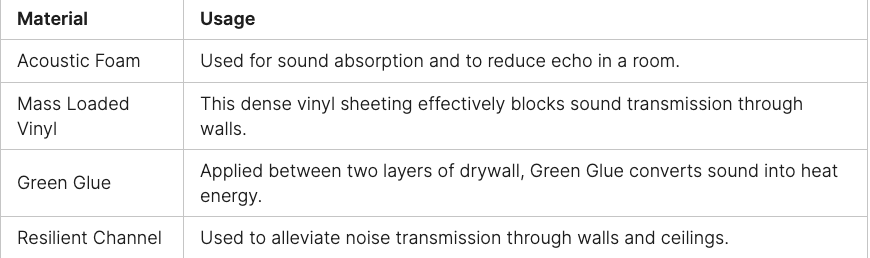
It's important to note that while these materials can provide excellent soundproofing, they can also add significant weight and mass to your studio. If you're renting your space, you may want to consider using removable sound barriers or curtains instead.
3. Soundproofing Techniques
There are various techniques that you can use to further enhance the soundproofing of your studio:
Decoupling - The use of resilient channels and sound isolation clips to separate walls and ceilings.
Green Glue - Applying Green Glue between layers of drywall to dissipate sound waves.
Using Thick Doors - Solid-core doors are more effective than standard doors in blocking sound transmission.
Double Drywall - Attaching two layers of drywall with a sound-deadening layer in between.
These techniques can be used together with soundproofing materials to create a highly effective acoustic environment for your home recording studio.
Acoustic Treatment for Superior Sound
Enhancing the acoustics of your home recording studio is crucial for capturing clear and balanced audio. One of the most effective ways of achieving excellent sound quality is through acoustic treatment.
Acoustic treatment involves using materials and techniques to control sound reflections and resonance within a space. By eliminating unwanted frequencies and echoes, you can create a recording environment that produces accurate and detailed sound.
Some popular acoustic treatment methods include:
Bass Traps: These are designed to absorb low frequencies that tend to build up in corners and along walls. By placing them strategically, you can balance the bass response of your room and prevent it from sounding muddy or boomy.
Diffusers: These scatter sound waves in multiple directions, creating a sense of spaciousness and depth in your recordings. They are particularly useful for treating mid- to high-frequency reflections and standing waves.
Absorbers: These materials, such as foam panels or fiberglass, absorb sound waves, reducing their amplitude and preventing them from bouncing around your room. They are effective for treating high-frequency reflections and creating a more neutral sound.
When planning your acoustic treatment, it's essential to consider the dimensions and shape of your room, as well as the type of music you'll be recording. Additionally, you may want to invest in measurement tools, such as a sound level meter or spectrum analyzer, to help you identify problem areas and fine-tune your treatment.
By incorporating acoustic treatment into your home recording studio, you can ensure that your recordings sound professional and polished. Invest the time and money into your acoustic treatment, and you'll be rewarded with pristine sound quality for years to come.
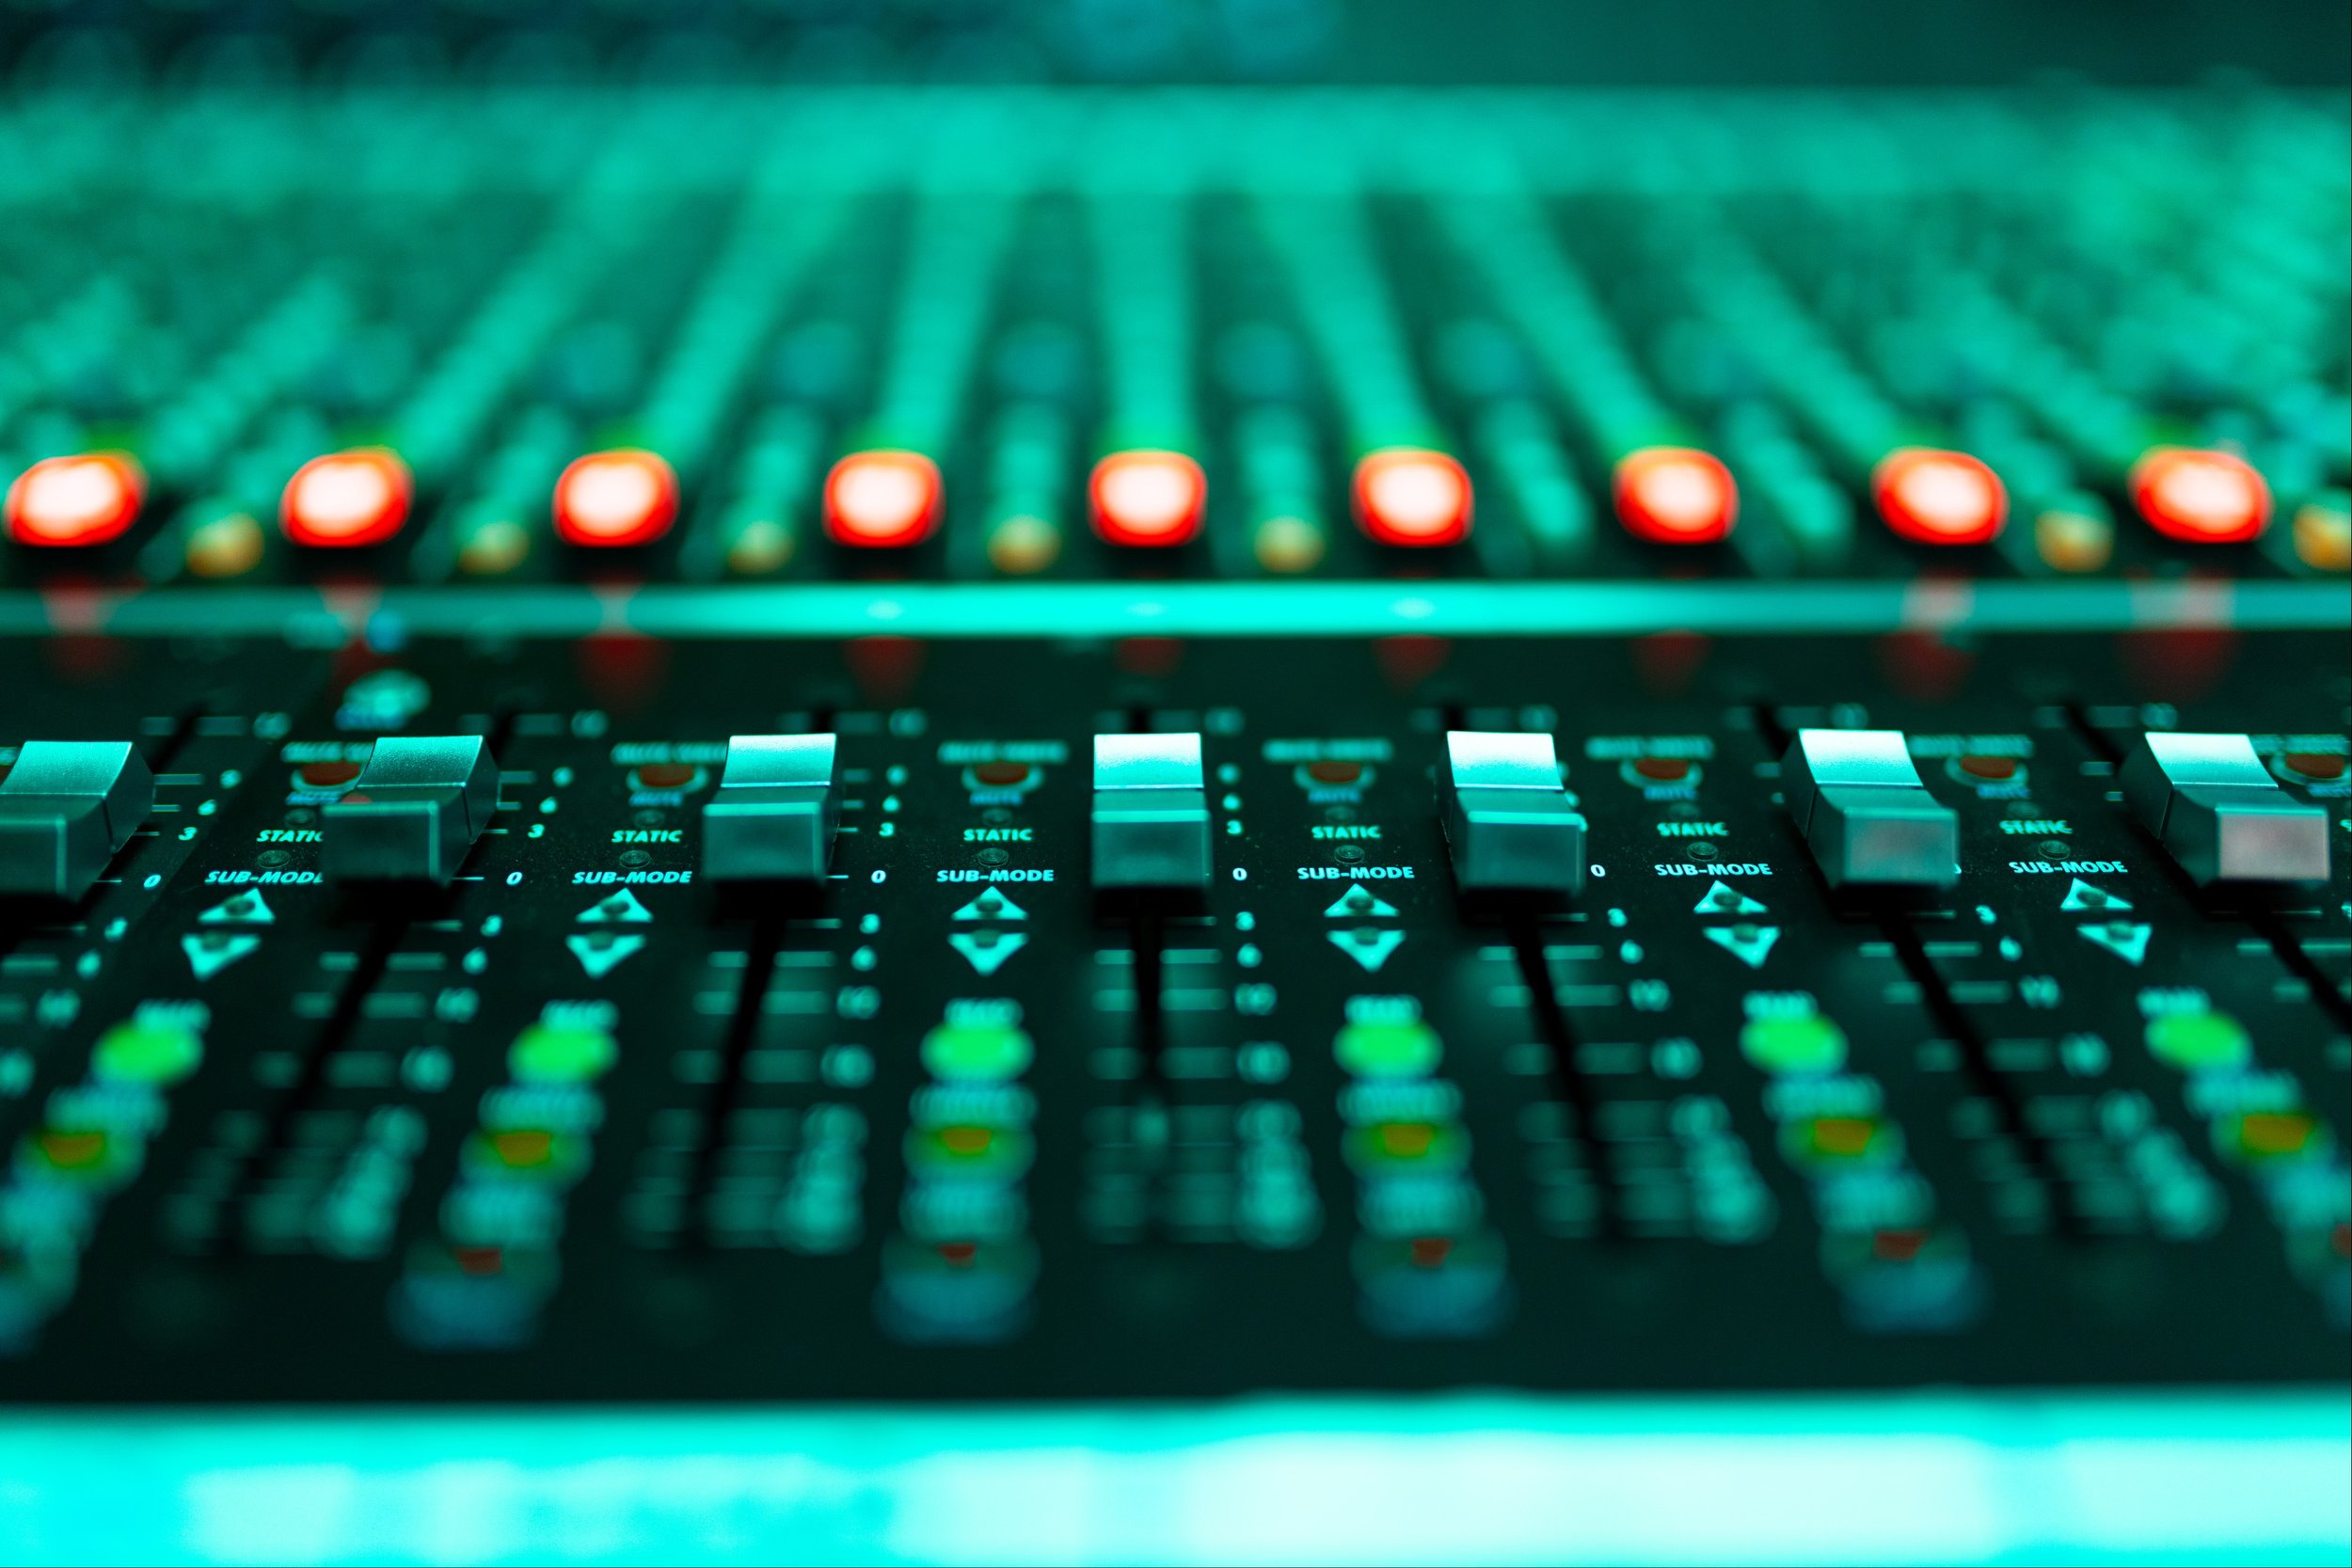
Essential Recording Equipment
Building a home recording studio requires selecting the right recording equipment to capture high-quality audio. Here are the essential pieces of gear you'll need:
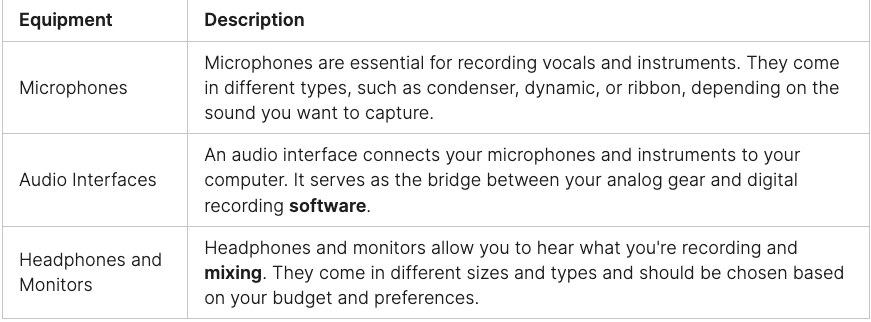
It's important to make informed purchasing decisions to ensure that your equipment suits your needs and budget. Don't hesitate to consult online resources and reviews, and try out equipment before committing to buying it.
Check out our blog for more resources regarding gear and home recording set-ups.


Setting Up Your Recording Space
Once you have your recording equipment, it's important to properly set up your recording space for optimal workflow and sound quality. Here are some steps to follow:
1. Organize Your Studio Layout
Arrange your equipment and furnishings in a way that maximizes space and functionality. Consider the workflow, ensuring that your equipment and peripherals are all within reach. Additionally, ensure that your workspace is comfortable and conducive to productivity.
2. Position Your Equipment
Proper placement of your equipment is essential for optimal sound quality. Consult your equipment manuals for recommended placement and follow industry best practices. For instance, your studio monitors should be positioned at an equilateral triangle with your listening position, at ear level for optimal sound imaging.
3. Optimize the Workflow
Arrange your workspace to optimize workflow and ensure that you can work efficiently. For instance, you may want to consider a standing desk, as sitting for long periods can be detrimental to your health and productivity. Also, keep cables organized and labeled, so you can quickly find what you need.
4. Consider Acoustic Treatment
Optimizing the acoustics of your studio is essential for capturing clear and balanced audio. Consider adding bass traps, diffusers, and absorbers to your room to minimize reflections, standing waves, and other acoustic anomalies.
By following these steps and taking the time to properly set up your recording space, you can create a functional and productive environment that will allow you to produce your best work.
Software and Digital Tools
Recording and producing music has become more accessible than ever, thanks to a plethora of software and digital tools available today. Here, we will discuss some of the popular recording software options, plugins and virtual instruments that can elevate your recording capabilities.
DAW Software
The Digital Audio Workstation (DAW) software is essential for recording, editing, and mixing music. Some of the popular options include:
Ableton Live - A versatile DAW that is suitable for electronic music production and live performances.
Pro Tools - A professional-grade DAW used in the music industry.
Logic Pro - A popular DAW among Mac users, known for its intuitive interface and extensive sound library.


Plugins and Virtual Instruments
Plugins and virtual instruments are software tools that can enhance your recordings with various effects and sounds. Some of the popular options include:
Plugin/Virtual InstrumentDescriptionNative Instruments KompleteA comprehensive collection of virtual instruments and effects, offering a wide range of sounds and textures.Waves PluginsA collection of high-quality audio plugins for EQ, compression, and more.Izotope OzoneA mastering plugin that can enhance the tonal balance, stereo width, and overall clarity of your recordings.


Software and digital tools are super fun and can greatly enhance your recording capabilities. However, it's important to take the time to learn how to use them effectively to avoid overwhelming your recording process. Experiment and find what works best for you and your music.
Mixing and Mastering Techniques
Mixing and mastering are two crucial components of the music production process. While mixing involves blending individual tracks together to create a cohesive sound, mastering is the final step in ensuring your music sounds polished and professional. Here are some techniques to help you achieve stellar results.
Mixing Techniques


A great mix requires a combination of technical skill and artistic expression. Here are some tips to keep in mind when mixing your tracks:
Start by setting the levels: begin by adjusting the volume of each track so that they blend together seamlessly.
Use panning to create a sense of space: experiment with panning tracks to the left or right to create an immersive stereo field.
EQ to balance frequencies: use an EQ to cut unwanted frequencies and boost areas where you want a particular instrument or vocal to stand out.
Compress to control dynamics: use compression to even out the levels of a track and add sustain to instruments like guitars or vocals.
Use effects sparingly: while effects can add depth and character to a track, it's easy to go overboard. Use them judiciously and only when they serve a purpose.
Mastering Techniques
When it comes to mastering, the goal is to enhance the overall sound of your music while ensuring it's optimized for different playback systems. Here are some techniques to try:
Use EQ to tweak the overall sound: a few minor adjustments can make a big difference in the final mix.
Apply compression and limiting: to make your music sound louder and more polished, use these techniques to control dynamics and boost volume.
Use stereo imaging to create width: by widening the stereo field, you can make your music sound more immersive.
Add dither: when exporting your final mix, adding a small amount of dither can improve the overall sound quality and reduce distortion.
Remember that mastering is an art. We do a ton of virtual mastering here at RPMusic Studios because people do not have the time to perfect the art. If you need help give us a shout!
API 1608 RPMusic Studios
Tips for Troubleshooting and Maintenance
Once your home recording studio is up and running, it's essential to perform regular maintenance to keep it in optimal condition. Here are some helpful tips and techniques for troubleshooting and maintenance:
Keep your equipment clean and dust-free: Dust, dirt, and grime can accumulate on your equipment, affecting its performance and longevity. Regularly clean your studio space and equipment with a microfiber cloth and gentle cleaning solution, if necessary.
Check your cables: Loose or faulty cables can cause a range of issues, from audio dropouts to noise interference. Check your cables regularly and replace any that are damaged or worn out.
Stay organized: Keep your studio space organized and tidy, using cable ties, racks, and shelves to store your equipment. This makes it easier to troubleshoot issues and prevents accidents or damage.
Backup your data: Regularly backup your recordings and project files to avoid losing data in the event of a hardware failure or other issues. Use an external hard drive or cloud storage service for peace of mind.
Stay up-to-date: Keep your recording software and plugins up-to-date with the latest releases and patches. This ensures optimal performance and compatibility with your hardware and operating system.
Common Issues and Solutions
Despite your best efforts, issues may arise with your home recording studio. Here are some common issues and their solutions:


By following these tips and techniques for troubleshooting and maintenance, you can keep your home recording studio running smoothly.
Conclusion
Building a home recording studio is a big deal, but with the right guidance and tools, it can be an enjoyable and rewarding experience. By following this step-by-step guide, you now have the knowledge to create a professional-quality recording space that meets your needs and budget.
Remember to Take Your Time
Remember to take your time and carefully consider each step of the process. Rushing into decisions can lead to costly mistakes and setbacks. Be patient and trust the process, and you'll be rewarded with a studio that inspires your creativity and produces exceptional recordings.
Stay Up-to-Date with Trends and Technology
Finally, it's essential to stay up-to-date with the latest trends and technology in the recording industry. Join online forums, attend workshops, and keep an eye on the latest gear releases. By staying informed, you can continue to grow and improve your recording skills and maintain a cutting-edge studio.


FAQ
How much does it cost to build a home recording studio?
The cost of building a home recording studio can vary depending on the equipment and materials you choose. It can range from a few hundred dollars to several thousand dollars. It's important to set a realistic budget and prioritize your needs to make the most out of your investment.
Do I need a dedicated room for a home recording studio?
While having a dedicated room for your home recording studio is ideal, it is not always necessary. You can create a functional studio in a corner of a room or even in a basement, as long as you take into consideration factors such as noise isolation and acoustic treatment.
Can I use my computer's built-in microphone for recording?
While it is technically possible to use your computer's built-in microphone for recording, it is not recommended for professional-quality results. Investing in a dedicated microphone will greatly improve the sound quality and give you more control over your recordings.
What recording software should I use?
The choice of recording software will depend on your specific needs and preferences. Popular options include Pro Tools, Logic Pro, Ableton Live, and Cubase. It's a good idea to try out different software options and see which one suits your workflow and features.
How important is acoustic treatment in a home recording studio?
Acoustic treatment is vital in a home recording studio to minimize reflections, echoes, and other acoustic issues. Proper treatment can greatly improve the sound quality of your recordings and create a more professional-sounding environment.
Do I need to hire a professional to set up my home recording studio?
While hiring a professional can be beneficial, it is not necessary to set up your home recording studio. With the right research, resources, and guidance, you can successfully build and configure your studio on your own.
How do I prevent background noise in my recordings?
To prevent background noise in your recordings, it's important to ensure proper soundproofing and noise isolation. This can be achieved through techniques such as using acoustic panels, sealing gaps and cracks, and positioning your microphones correctly.
How long does it take to build a home recording studio?
The time it takes to build a home recording studio can vary depending on various factors, including your budget, available time, and the complexity of the setup. It can range from a few days to several weeks or even months, depending on your specific requirements and goals.
What are some common troubleshooting issues in home recording studios?
Some common troubleshooting issues in home recording studios include audio latency, driver compatibility, microphone interference, and connectivity problems. Proper troubleshooting techniques and regular maintenance can help resolve these issues and keep your studio running smoothly.
Can I use my home recording studio for podcasting?
Absolutely! A home recording studio can be a great space for podcasting. With the right equipment and setup, you can capture high-quality audio for your podcasts and create a professional-sounding end product.
Search for Used Gear Here: https://tidd.ly/3RD5GAX
Take a look at our Reverb Shop here: https://reverb.com/shop/rpmusic
Hey, we’re RPMusic Studios, a real-life Recording Studio on the beautiful Eastern Shore of Maryland. We love our recording studio, YouTube Channel, and Blog, and we hope you do too. If you enjoyed this post, don’t forget to SUBSCRIBE below. Want to learn some awesome recording tips? Grab your FREE GUIDE here. And feel free to visit our website, follow us on social media, and drop us a line anytime. We’d love to hear from you! 🎸
If you think someone will like what we do please forward!
Disclaimer: These are affiliate links, which means we receive a commission if you click on them and make a purchase. As Amazon and Reverb Associates, we earn from qualifying purchases. This is at no additional cost to you and it helps us fund our business and bring you more helpful content. We only recommend products that we believe in. Thank you for your support!
If you dig this then subscribe to our newsletter to get more!